Generating Terrain With NarGen
17th August 2023
The following tutorial will show you how to create a terrain world using NarGen, a tool I created for a computer game I intended to make but likely never will. To follow the tutorial you will need to install NarGen from the GitHub repository and make that cloned repository your working directory.
Creating a world from a template
We are going to start by creating a new world using the Canvas template. This can be done with the following command.
$ nargen new-world Tutorial-World Canvas
Our new world, called Tutorial-World, has now been created at configs/Tutorial-World/. All the files needed to configure our world are found in that directory. To generate and render the world, run the following command.
$ nargen generate-and-render Tutorial-World

As you can see, our world is just a grassy plain with some trees scattered around the slightly elevated land. Amongst other things, there is an obvious lack of water. Let's add some by creating an ocean biome.
Adding water
To add a biome, what we need to do is create a configuration file inside configs/Tutorial-World/biomes/. Our file will be called ocean.json because it defines the ocean biome that we wish to create. Copy the JSON object below into the newly-created ocean.json file.
{
    "colour": [20, 100, 255],
    "ranges": [
        [1, "water"]
    ],
    "water": {
        "colour": [20, 100, 255],
        "altitude_surfaces": [
            [10, "short_grass"]
        ],
        "amplitudes": [1, 0.5, 0.25, 0.2, 0],
        "height_displacement": -22,
        "height_multiplier": 10
    }
}
We now need to reference the new biome. Change the biomes attribute inside the CONFIG.json file so that it looks like this:
"biomes": [
    [1, "ocean"],
    [2, "land"]
]
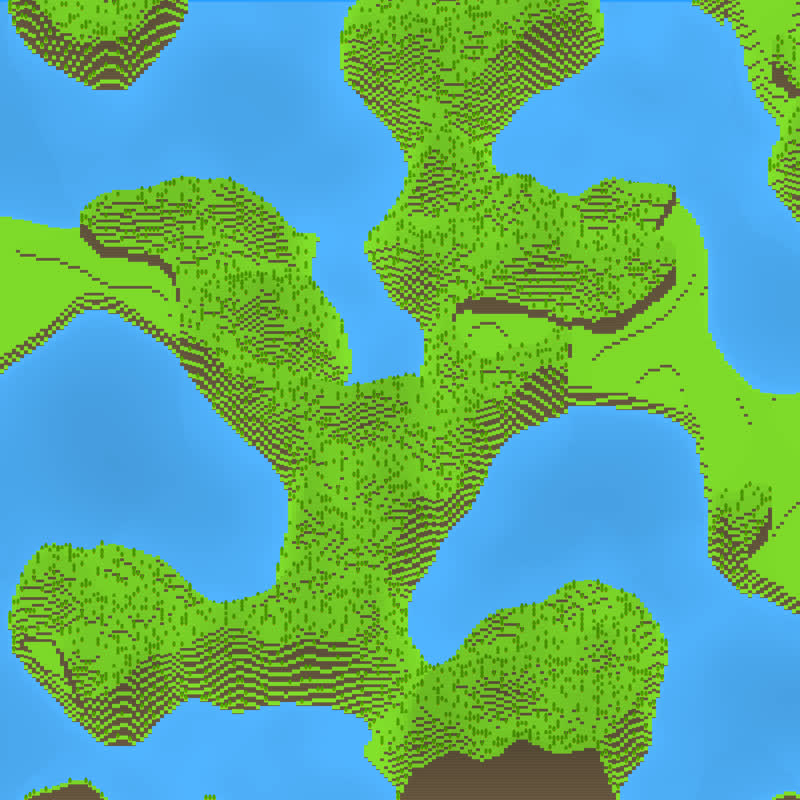
When we generate and render our world we can see that we now have some beautiful bodies of water.

Defining a plateau
Let's create some plateaus. Rename the hills sub-biome inside the land biome to plateau and increase its height_displacement attribute from -10 to -5. This will raise it five units above the land around it, producing the plateau that we want.
Enhancing our plateau
Around the edge of our plateau, we want to have an additional edge vertically in between the plateau and the plain beneath. We want this edge to be the height of the present plateau which must be elevated further. To do this, increase the height_displacement again, this time from -5 to 5.
To add the edge around the plateau, we will add another sub-biome. Let's call it plateau_edge. Define this sub-biome inside land.json by adding the following definition:
"plateau_edge": {
    "colour": [180, 60, 0],
    "altitude_surfaces": [
        [5, "short_grass"]
    ],
    "ornaments": [
        ["OCCURRENCE", 0.2],
        ["bruce_tree", 1, 35, 1]
    ],
    "amplitudes": [0.5, 0.1, 0.1, 0.2, 1],
    "height_displacement": -5,
    "lower_height_multiplier": 30,
    "upper_height_multiplier": 40
}
We can now reference the sub-biome inside the ranges attribute of land as shown below:
"ranges": [
    [1, "plain"],
    [0.2, "plateau_edge"],
    [1.3, "plateau"]
]
The definition above has set the size of our new sub-biome to 0.2 fractions.

Changing surface material
We can now see that the world is looking much more interesting. The surface, however, is still composed entirely of grass. To colour it up a bit, let's add some sand to the shores of the plain sub-biome by defining its altitude_surfaces attribute as follows:
"altitude_surfaces": [
    [3, "sand"],
    [10, "short_grass"]
]
What the above definition does is tell NarGen which surface materials to use inside the plain sub-biome at different altitudes: sand at all tiles where the altitude is less than three and short grass at all tiles with altitudes greater than or equal to three.
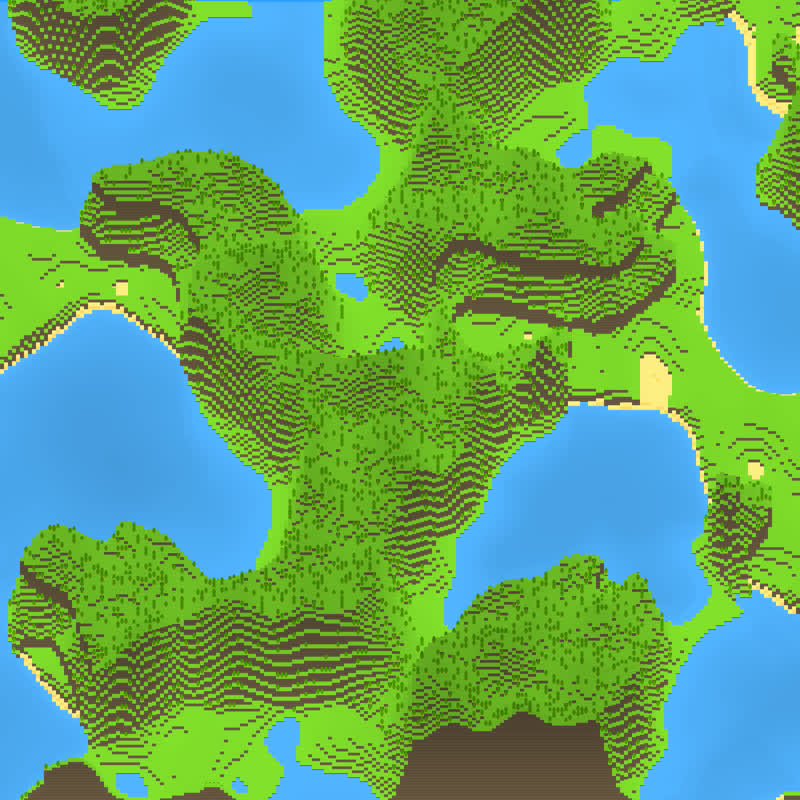
Upon generating and rendering our world, we see that this has a subtle effect.

Adjusting amplitudes
Whilst plains are often pretty, we want to replace ours with land that is slightly more textured. To do this, we can adjust the amplitudes of the underlying Perlin noise algorithm.
Replace the 0 at the end of the amplitudes array inside the configuration for the plain sub-biome with a 1. This should give us the following:
"amplitudes": [1, 0.5, 0.25, 0.2, 1]
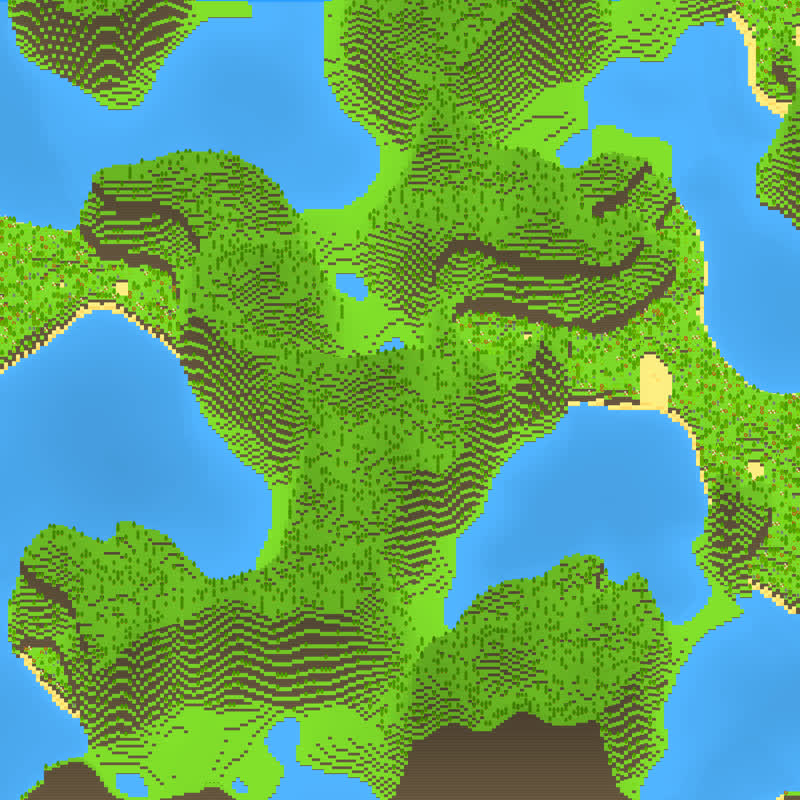
Each number in the array above specifies how much of an influence each underlying noise function has on the terrain produced. The first element specifies the influence of the noise function with the largest waves, and each element after that specifies the influence of functions with progressively smaller waves. By increasing the last value from 0 to 1, we are increasing the influence of the noise function with the smallest waves and thus the greatest detail. The result is terrain that is more rugged, as can be seen below.
Ornamentation
Now that we have shaped the terrain to our liking, let's add some trees and other ornaments to our world. Before we add some to the plain sub-biome we will rename it to forest so that it is named more appropriately.
Once it is renamed, add the following ornaments attribute to its configuration.
"ornaments": [
    ["OCCURRENCE", 0.5],
    ["bruce_tree", 1, 35, 2],
    ["fat_bruce_tree", 1, 35, 2],
    ["niamh_tree", 1, 35, 2],
    ["ploon_tree", 1, 35, 2],
    ["poppy_bed_1", 1, 35, 1],
    ["daisy_poppy_bed", 1, 35, 1],
    ["glim_rock", 1, 35, 0.5]
]
The first element inside the above array defines the rate at which ornaments occur inside the forest sub-biome. In our case, around 50% of tiles will contain an ornament of some sort.
The elements after that specify the ornaments that can appear in the sub-biome, along with the minimum height that they can occur, the maximum height that they can occur, and the probabilistic weight of each being chosen, respectively. You can see in our configuration above that the bruce_tree is two times more likely to be chosen on an eligible tile than the daisy_poppy_bed.
Generating and rendering our world now results in the following:
Now we are going to add some ornaments to the plateau above. Replace the ornaments attribute inside the plateau configuration with the following:
"ornaments": [
    ["OCCURRENCE", 0.5],
    ["bruce_tree", 20, 35, 4],
    ["fat_bruce_tree", 20, 35, 3],
    ["niamh_tree", 20, 35, 3],
    ["ploon_tree", 20, 35, 3],
    ["poppy_bed_1", 16, 35, 1],
    ["poppy_bed_1", 1, 5, 1],
    ["poppy_bed_2", 1, 5, 1],
    ["daisy_poppy_bed", 1, 5, 2]
]

Finally, we will decorate the remaining shoreline with some daisy and poppy beds. Because this remaining shoreline exists in the ocean biome, we will need to move to ocean.json. Add the following ornaments attribute to the water sub-biome:
"ornaments": [
    ["OCCURRENCE", 0.3],
    ["daisy_poppy_bed", 1, 10, 2],
    ["poppy_bed_2", 3, 10, 3],
    ["ploon_tree", 3, 10, 0.5],
    ["bruce_tree", 3, 10, 0.5]
]

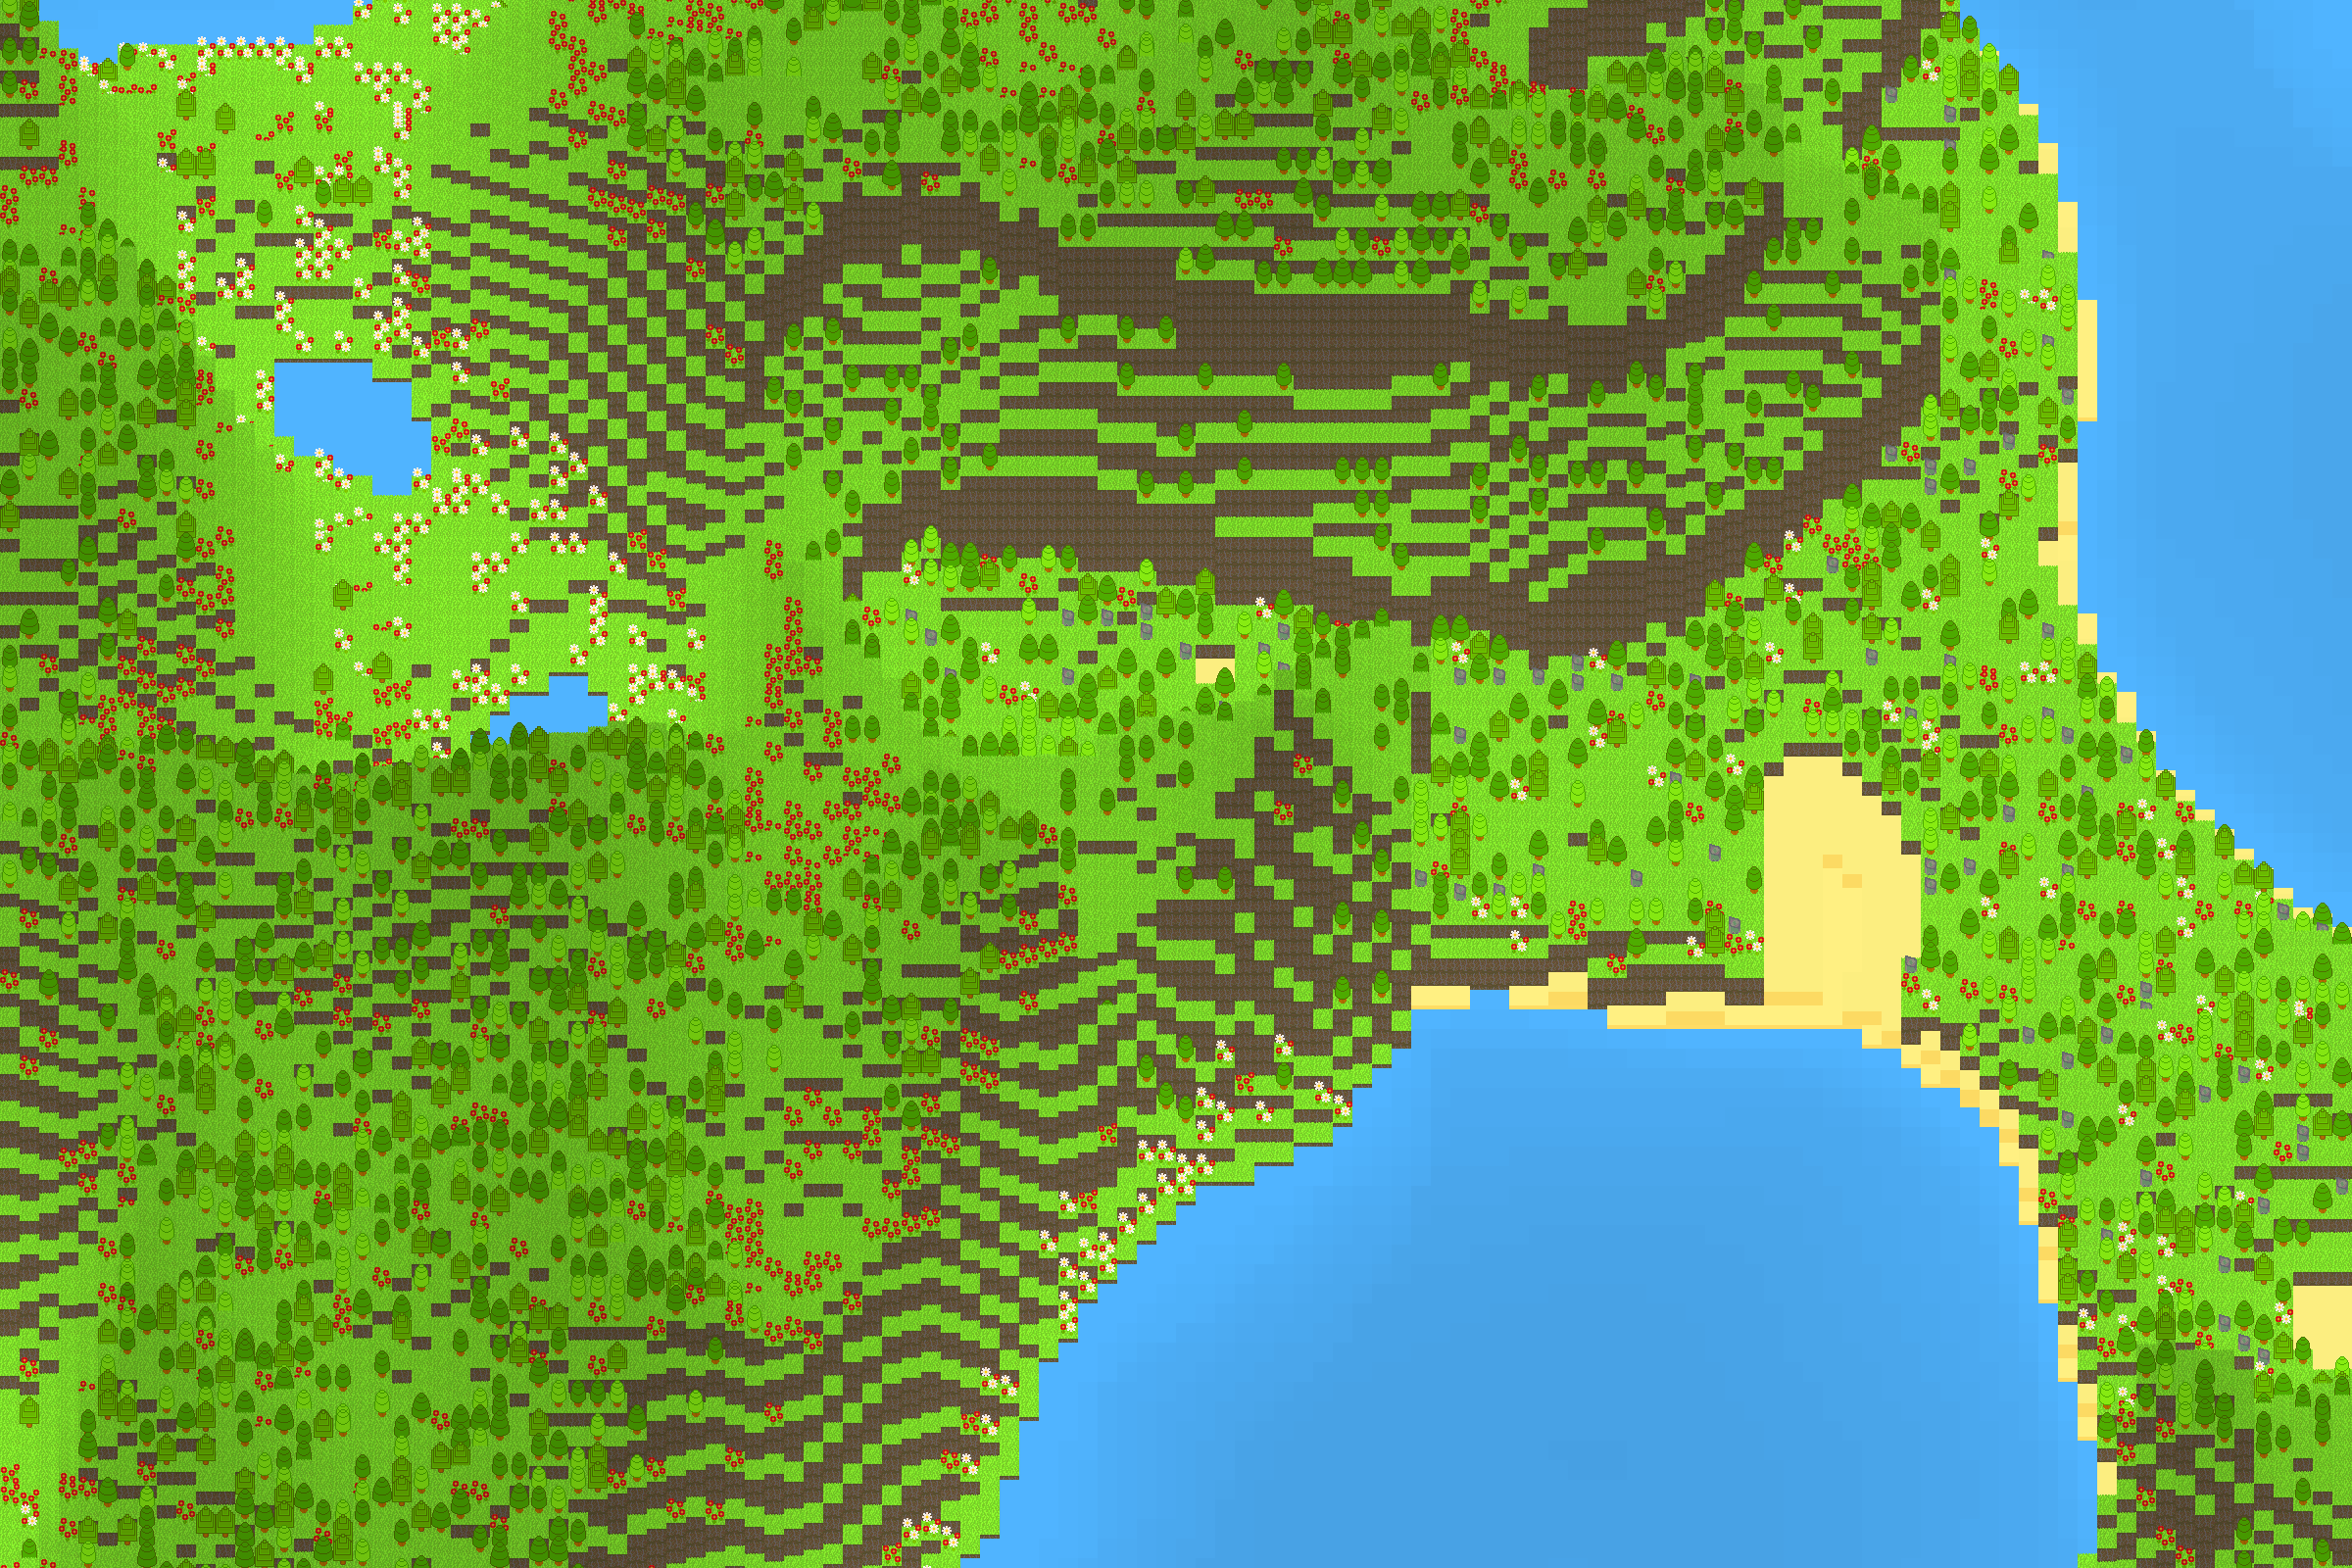
End result
We have now produced a beautiful terrain world consisting of lakes, forests, uplands, and lowlands — and all this just by tweaking some values. If you get creative then mountains, volcanoes, and rivers can all be produced. The short clip below is a time lapse of the design process. When NarGen is more complete, documentation and further tutorials will be made available.
